


There are plenty of advantages stemming from efficient DIY solar panel installation and, if done right, they can save both you and the environment money. Correct solar panel mounts are essential for maintaining efficiency over long periods of time. In this guide, we will cover some essential tips DIYers must follow so that they can achieve success in their solar panel setups.
Learning About Solar Mounting Systems
You need to learn about different mounting systems before you install the solar panels. Fixed mounts, trackers, and adjustable mounts are the three most common. Fixed mounts are stationary and their price is incredibly low compared to the other systems. Being able to adjust the angles of the mount means you can get more direct sunlight throughout the duration of the day, adjustable mounts allow for this. For maximum solar energy usage, mounts that move according to the sun’s position can be used, albeit at a greater price. You must balance your spending, location, and energy requirements to choose the right option.
Placing of the Solar Panels
Choosing where to set up your solar panels is crucial in improving their productivity. Your solar system performs best in areas devoid of obstructions such as trees, buildings, and other objects which would cover the solar panels. Make sure they face south if in the Northern Hemisphere and the other way if in the Southern Hemisphere. You should also pay attention to the roof angle, as the solar pitch should be between thirty and forty-five degrees to capture the most sunlight.
Required materials and tools
To properly install the solar energy system, you need to assemble the following equipment beforehand; stepping drills, solar mounting brackets, drained level, solar panels, tempered glass and screws. It's also critical that the materials are of high quality and able to withstand severe atmospheric pressure, which renders increased reliability and optimal performance to your device.
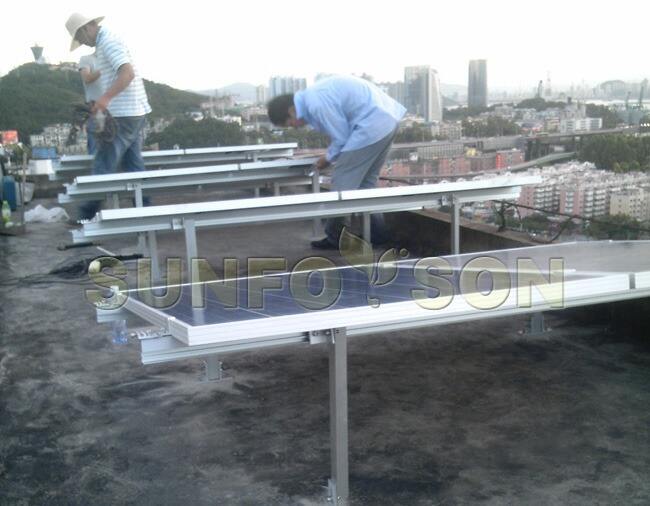
Installation Process
When you choose your mounting system and location, the next step is beginning the installation. For starters, mount the brackets at the top of the roof. Be sure to level them; this aids in keeping them straight and well aligned. Afterwards, fasten the attached brackets’ rails and tighten the screws. Lastly, the solar panels should be mounted to the rails, but remember to follow the manufacturer’s description. To make sure the installation is successful, be patient and gentle through the entire process to avoid mistakes that can ruin the installation.
Maintenance and Safety Tips
To achieve the best performance out of solar panels, maintenance is a requisite practice after installation. Ensure that the area around the panels is inspected for any leftover debris, dirt, or even snow that might prevent sunlight from hitting the solar panels directly. Furthermore, the mounting system also requires routine checks for any potential damage or excessive wear. Always have personal protective equipment on, as safety should come first. Moreover, if there is any uncertainty in the details of the installation process, it’s best to contact an expert.
Industry Trends and Its Projections
With the continual innovation in technology, the solar energy industry is changing for the better with more efficient solar panels and mounting systems. Integrated solar roof tiles and smart trackers are gaining traction. As renewable energy, including solar installations, becomes increasingly popular, the availability of information and guides will become necessary, especially for self-installation. Homeowners need to stay on top of the changes and advancements in solar mounting practices. Following the tips provided will guarantee a fruitful investment on solar energy systems.